The core services of a Windows environment are Active Directory and DNS. We will go through the basic installation of those two Service Roles. We are using Windows Server 2008R2 since I found it very stable and a bit lighter than any newer version of Windows Server.
First of all, we will add the Windows Server on the same environment as our Virtual Router (NAT Device) that we created on a previous post, bridged with the Ethernet NIC - 10.10.10.0/24 network
We will chose 10.10.10.1 for our Main Server.
We will also give a more friendly name to our host. Run the sysdm.cpl cmd
Press Change... to rename your PC name. After applying the name, the Machine has to restart, in order the changes to apply.
To install the Active Directory Domain Services (AD DS) we will use the DC Promo (Domain Controller Promoter) tool. On newer versions of Windows the installation is much simpler.
To start the DC Promo tool, we simply need to run the cmd command dcpromo.exe
We will use the simple mode (we will keep the Advanced option unchecked)
Since this our first Domain Controller, we will choose the last option.
We will use 2008R2 forest functional level, since we will not use any earlier version of Windows Servers and we also want to get the most features on this setup.
The warning below is normal, since we do not have a DNS Server already configured for our domain, so we can ignore.
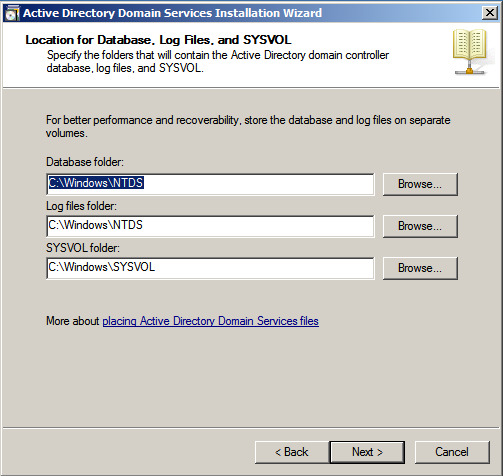
The default AD DS folders are under %windir%, but we will change that to C:\AD\
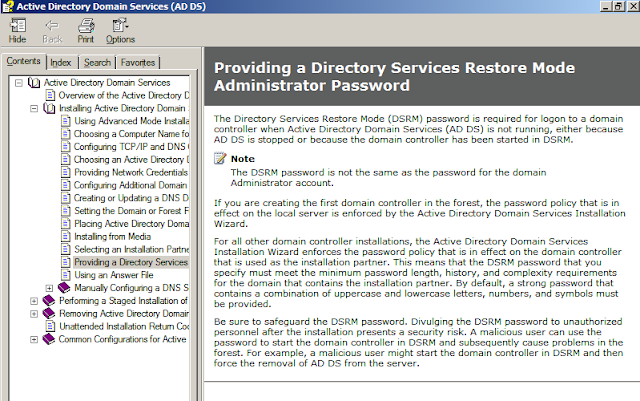
At the end we will be asked for a DSR Mode Password for DR purposes.
We can get more info, by pressing the hyper link of the Wizard
On the summary page, we can see all the information we have specified. We have the option to export the settings and create an unattended file. We will press Next.
We will chose the Server to be restarted after installation succeeds.
After the computer restarts, we can go to Start > Administrative Tools and run the DNS Application.
We will right click on the Folder (theo.local) or on the main page.
We will create an A Record "Router" that point to IP Address 10.10.10.254.
We expand the Server, the Forward Lookup Zones and then the domain (theo.local)
We will get a feedback that the record has been successfully created.
We can confirm that we can resolve the hostname router using the PING on nlookup tool, from a machine that has this Server as its DNS. In this example we can use the same server, since it has been setup to point to itself for DNS queries.
First of all, we will add the Windows Server on the same environment as our Virtual Router (NAT Device) that we created on a previous post, bridged with the Ethernet NIC - 10.10.10.0/24 network
We will chose 10.10.10.1 for our Main Server.
We will also give a more friendly name to our host. Run the sysdm.cpl cmd
Press Change... to rename your PC name. After applying the name, the Machine has to restart, in order the changes to apply.
To install the Active Directory Domain Services (AD DS) we will use the DC Promo (Domain Controller Promoter) tool. On newer versions of Windows the installation is much simpler.
To start the DC Promo tool, we simply need to run the cmd command dcpromo.exe
We will use the simple mode (we will keep the Advanced option unchecked)
Since this our first Domain Controller, we will choose the last option.
We will specify the FQDN of our forest.
We will use 2008R2 forest functional level, since we will not use any earlier version of Windows Servers and we also want to get the most features on this setup.
Since AD DS relies heavily on DNS, it is better for both Services to run on the same Server. Of course on real world environments, we have clusters of multiple AD DS and DNS Servers. As you can see from the info provided by Microsoft, the DNS Server is recommended to be installed on the first domain controller.
The warning below is normal, since we do not have a DNS Server already configured for our domain, so we can ignore.
The default AD DS folders are under %windir%, but we will change that to C:\AD\
At the end we will be asked for a DSR Mode Password for DR purposes.
We can get more info, by pressing the hyper link of the Wizard
On the summary page, we can see all the information we have specified. We have the option to export the settings and create an unattended file. We will press Next.
We will chose the Server to be restarted after installation succeeds.
After the computer restarts, we can go to Start > Administrative Tools and run the DNS Application.

We will right click on the Folder (theo.local) or on the main page.
We will create an A Record "Router" that point to IP Address 10.10.10.254.
We expand the Server, the Forward Lookup Zones and then the domain (theo.local)
We will get a feedback that the record has been successfully created.
We can confirm that we can resolve the hostname router using the PING on nlookup tool, from a machine that has this Server as its DNS. In this example we can use the same server, since it has been setup to point to itself for DNS queries.


No comments:
Post a Comment