After installing our Hypervisor (for example check my previous post for Oracle VirtualBox) we can start creating our first VMs. Actually before that, we have to make sure that our System supports virtualization and that Feature is enabled. For Intel processors, you can follow the link.
For the Intel® Processor Identification Utility, you can go to CPU Technologies TAB and check that the Virtualization Technology is supported.
For both AMD and Intel processors, you can use the SecurAble
This application doesn't require an installation and you can quickly check if your CPU can support virtualization
You can always check the same information on the manufacturers website. For example for Intel Processors browse to the specific processor
On the BIOS settings, you have to enable Hardware Virtualization Intel VT-x or AMD-V. You have to check the manufacturer's manual (Lenovo)
Now lets spin some VMs!
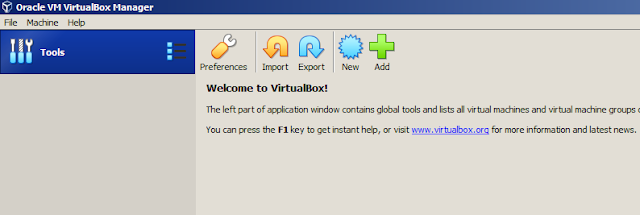
Press New
Specify the Name: Windows 10
The application is smart enough and will change automatically the type to Microsoft Windows and the version to Windows 10 (64-bit)
We have to also specify the Machine Folder. We will into details later, but just keep in mind that a VM is a folder that contains different type of files. Since we will create tens of VMs, we want to keep all of them under the same root folder, for example C:\Virtual Machines. The VM Folder has to run under SSD Storage else your disk won't be able to cope with the load.
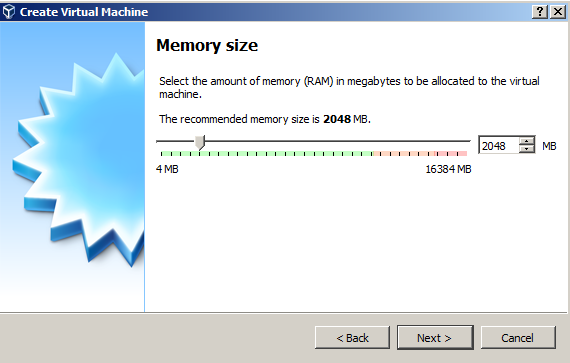
Based on the Operating System we specified, the Oracle Software will chose a memory size - here 2GB. As you can see the RAM size is adjustable. We can also change after we have created the VM and even afte we have installed the OS. Since RAM resources will be shared between VMs we don't want to overprovision the VM and also we don't want to use a very low value, else our VM will suffer.
We will create a new Virtual Disk now
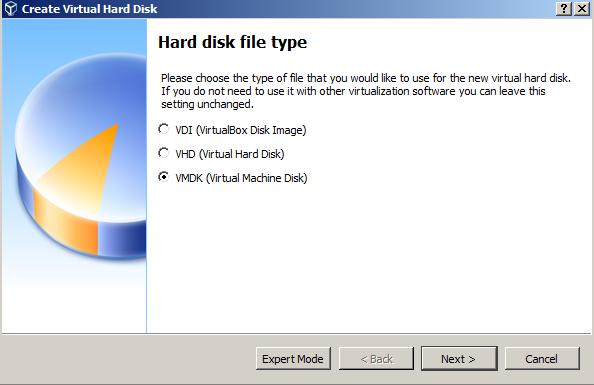
If we want our Disk to be compatible with VMWare application we can choose VMDK, or with Hyper-V then we can select VHD. The default is VDI which is the native VIrtual Box format. We will go with VMDK.

Hard disk file: Dyamically allocated is the preferend method, as it only use spce on your physical hard disk as it fills up.
Lets say that we have a 200GB disk. If we chose fixed size of 50GB for each of our VMs then we can only install 4VMs (4x50GB=200GB). Now lets consider that we use the dynamic option. We can still give our VMs 50GB, but if they only consume lets say 10GB, then we can have up to 20VMs on our physical disk (20 x 10GB = 200GB). The only problem is that since all those VMs can grow up to 50GB, we may runout of space on our physical disk. So I would suggest to use the dynamic option, but always monitor your disk in order to prevent provisioning.
Now we can give the Disk location and Disk size.
After pressing create we have our new VM
and the folder created under the location we have specified
Let's press start and Power On our VM
Virtual Box will detect that this VM is blank and it requires an OS to be installed, so it prompt us to specify the installation disk (ISO)
We can browse and select the ISO with the OS and then press Start
We are good to go!


No comments:
Post a Comment